Editing a notification
Click any template on the Notifications list to open its editor. The left side is the configuration; the right side is a live preview of exactly what the customer receives.
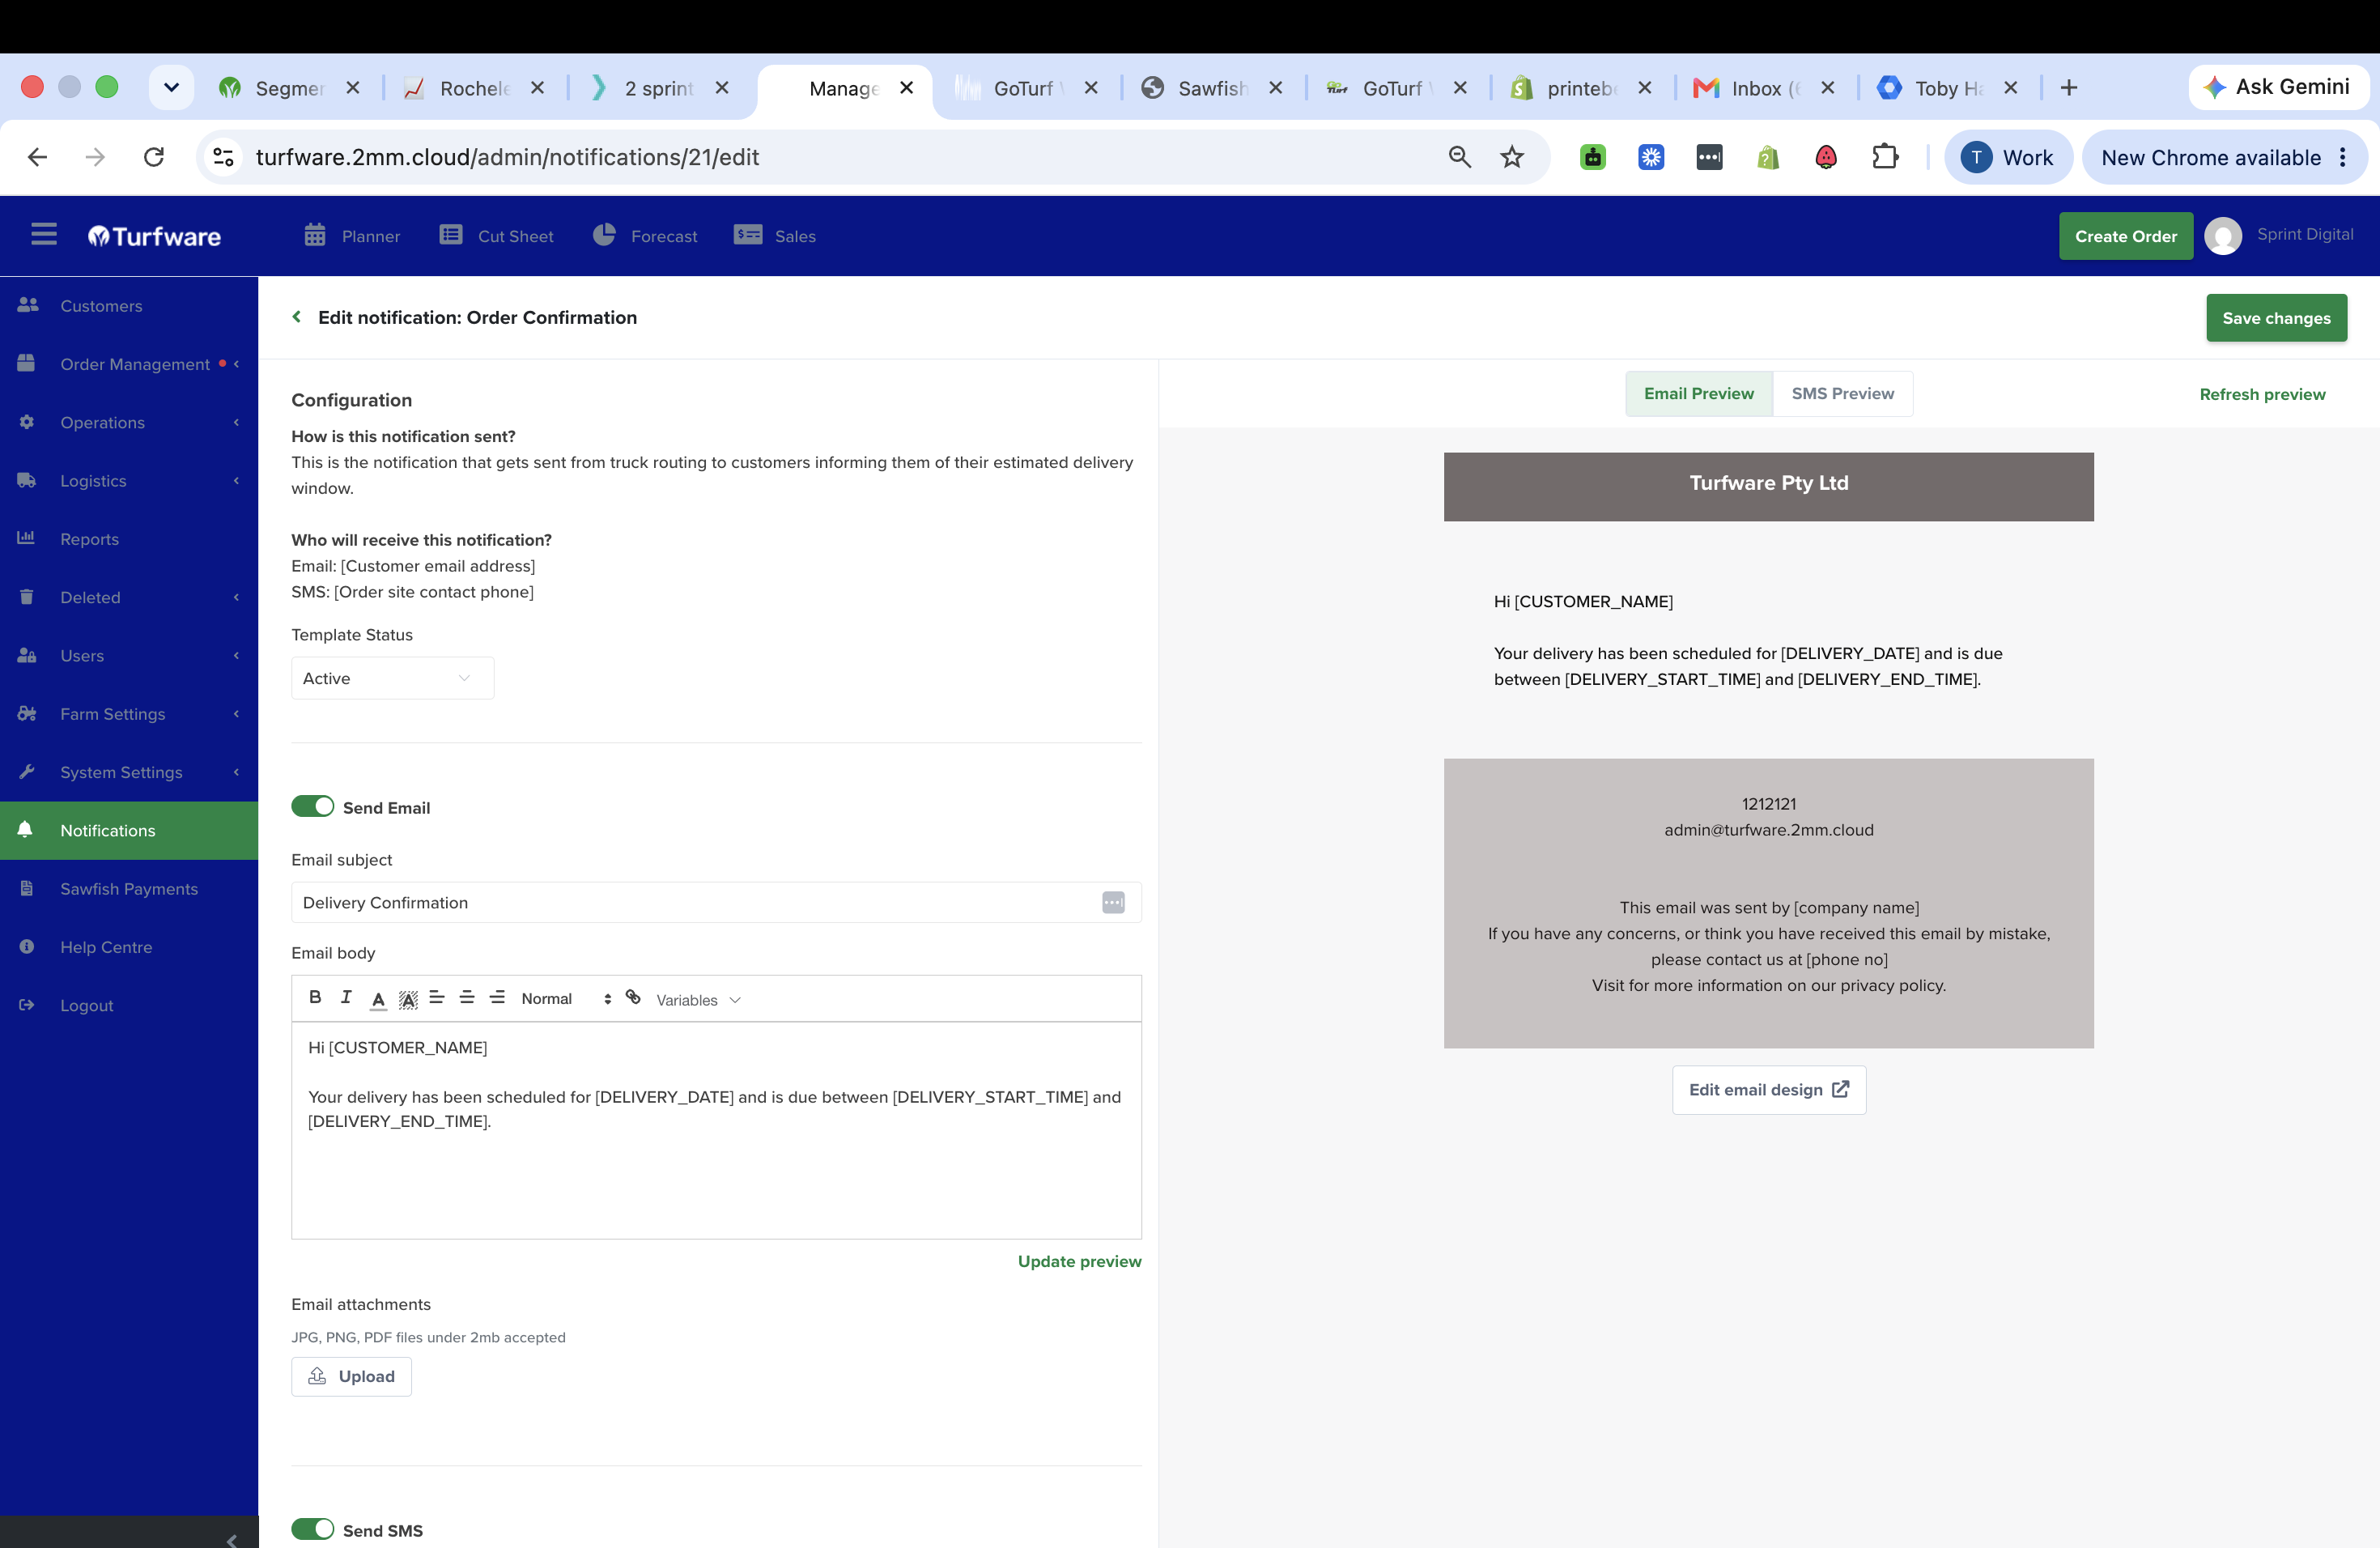
Configuration
- How is this notification sent? — a plain-English note of when the message fires.
- Who will receive this notification? — the Email and SMS recipients for this message (for example, Email = the customer's email address; SMS = the order's site-contact phone).
- Template Status — Active or Inactive. Set it Inactive to stop this message sending without losing its content.
Email
- Send Email — toggle the email on or off.
- Email subject — the subject line; you can insert variables here too.
- Email body — a rich-text editor (bold, italic, colour, alignment, links). Click Variables to insert a merge field — see Variables.
- Email attachments — attach JPG, PNG or PDF files under 2MB to send with the email.
SMS
- Send SMS — toggle the SMS on or off. The SMS is its own short message — check it under SMS Preview.
Preview
The right panel shows a live Email Preview and SMS Preview — what the customer will actually see, with your header, footer and branding, and the variables filled with sample data. Click Update preview / Refresh preview after editing to refresh it.
Branding
Edit email design (top right, or on the list) opens the shared header, footer and colours applied to every email — your logo, contact details and sign-off.
Save
Click Save changes.